
TL;DR
A closet rig’s noise and sound quality depend mainly on placement, acoustic treatment, and ventilation. Moving it to another room or sealing gaps can make a bigger difference than foam alone. Proper airflow prevents heat damage and keeps noise controlled.
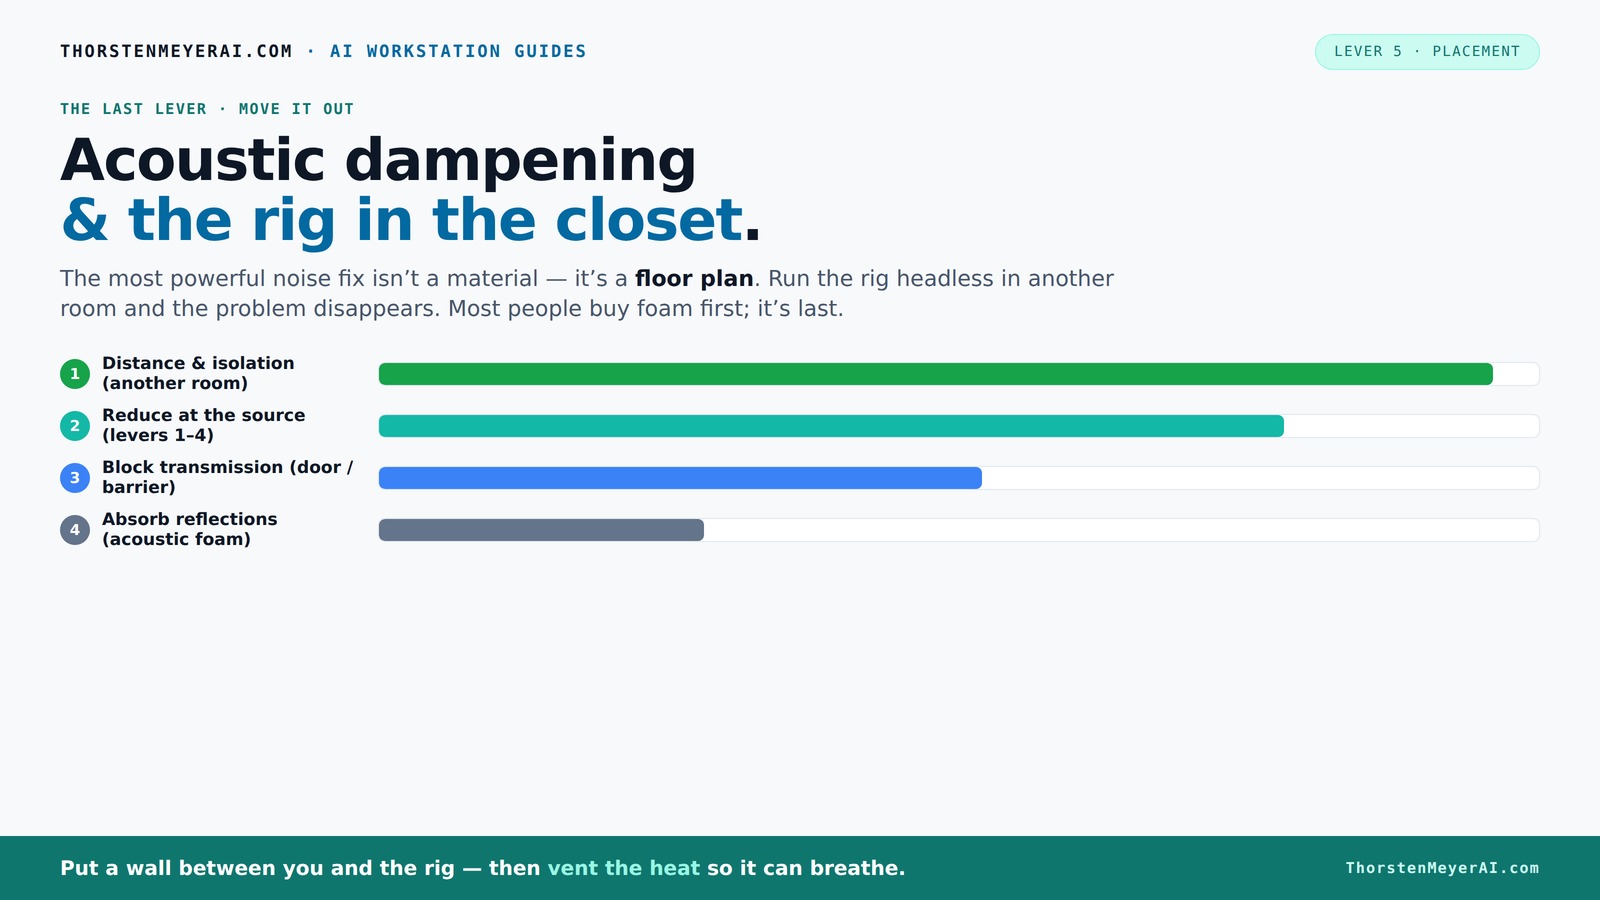
Acoustic dampening
& the rig in the closet.
The most powerful noise fix isn’t a material — it’s a floor plan. A rig you can’t hear because it’s in another room beats any amount of foam. Tap the approaches in Part 1 to see what actually works.
(another room)
(levers 1–4)
(door / barrier)
(acoustic foam)
Contain the noise, not the heat
Key Takeaways
- Moving your rig into another room or closet can dramatically reduce noise without buying foam or soundproof barriers.
- Treat multiple surfaces—walls, ceiling, door—to reduce reflections and low-frequency buildup in small spaces.
- Proper ventilation prevents heat damage and keeps noise under control in sealed closet setups.
- Layered treatment with foam, blankets, and sealing gaps offers the best bang for your buck.
- Mic placement behind reflection filters and away from walls enhances recording clarity in tiny rooms.

Focusound 52 Pack Acoustic Foam Panels 1" x 12" x 12" Sound Proof Foam Panles Soundproofing Noise Cancelling Wedge Panels for Home Office Recoding Studio with 300PCS Double-Side Adhesive
- Soundproofing Design: Triangular grooves for noise absorption
- Includes Adhesive Tape: 300pcs double-sided adhesive for easy installation
- Easy Shape Recovery: Reforms shape after soaking in water
As an affiliate, we earn on qualifying purchases.
As an affiliate, we earn on qualifying purchases.
Why Your Closet Setup Is More About Placement Than Foam
Placing your rig in a closet is often misunderstood as a quick fix for noise. The truth is, the biggest impact comes from where and how you position the machine and the microphone. Moving your rig into another room or a closet with a door can cut noise transmission dramatically, often more than adding foam. Think of it like hiding the noise source behind a wall—distance is your best friend.
For example, if you’re recording vocals, the mic should be placed where it captures the voice directly and minimizes reflections. Meanwhile, your AI rig in the closet can roar away, while your workspace stays silent. This approach makes soundproofing secondary and acoustic treatment more targeted, reducing echoes and harshness inside the tiny space.
Acoustic Dampening vs. Soundproofing: What You Really Need
Acoustic dampening and soundproofing are often confused, but they serve different purposes. Dampening reduces reflections and echoes inside a space, making recordings clearer. Soundproofing stops sound from leaking out or coming in, which requires heavy barriers and sealing gaps.
In a closet, your goal is usually dampening—softening reflections—since fully soundproofing a tiny space is tough and costly. Use thick foam panels (around 2 inches) on walls and ceiling to absorb reflections. Seal gaps around the door with weatherstripping or blankets to prevent noise escape. You’ll get better results by combining dampening with strategic placement than by trying to fully soundproof a small closet.
Best Mic & Treatment Placement for Tiny Closets
The key to quality sound in a tiny closet is placing the mic where it picks up the voice with minimal reflection. Usually, this means positioning it at least 6 inches away from the wall behind, pointing directly at the source. Use a reflection filter or a small foam panel behind the mic to block bounce-back.
For treatment, focus on the first reflection points—these are spots where sound bounces off walls before reaching the mic. Use a mirror to find these points and attach foam panels there. Don’t forget the ceiling and side walls; small rooms amplify low-end buildup, which can be tamed with bass traps in the upper corners.
Understanding the importance of placement is essential because the proximity of your mic to reflective surfaces greatly influences the clarity and warmth of your recordings. Proper positioning minimizes unwanted reflections that cause muddiness or harshness, resulting in a more natural and professional sound. Additionally, treating first reflection points ensures sound energy is absorbed before bouncing back into the mic, reducing echo and room tone that can distort your recordings.
Prioritizing Walls, Door, and Ceiling Treatment
In a closet, every surface matters. Prioritize sealing the door with weatherstripping and adding a blanket or foam layer. After that, treat the wall behind the mic, the ceiling, and any parallel walls to prevent standing waves and flutter echoes. Bass traps in the upper corners help tame low frequencies that tend to amplify in small, enclosed spaces.
For example, a DIY setup might involve mounting foam on the door, installing a few panels on the wall behind the mic, and hanging a rug on the ceiling. These small steps significantly improve clarity and reduce harshness.
Foam, Blankets, and Panels — Which Works Best?
All these materials absorb reflections, but their effectiveness varies. Foam panels are lightweight, easy to install, and excellent for high frequencies. Blankets and rugs are cheap and good for larger, low-frequency absorption, especially in small spaces.
For a budget DIY project, layering blankets over foam panels or hanging them from the ceiling can cut down echoes. Thicker foam (around 2 inches) absorbs more low-end, but for tiny closets, a mix of foam and soft materials like blankets provides the best balance.
Common Mistakes That Wreck Your Closet Sound
Many folks seal the door completely or fill every inch with foam without considering heat or reflection paths. This traps heat and creates a hot, echoey mess. Others ignore the importance of mic placement, resulting in muffled or overly reverberant recordings.
Another mistake? Relying solely on foam, which only reduces reflections, not sound leakage. Always remember: placement, ventilation, and layered treatment matter more than just stuffing foam everywhere.
How to Deal with Heat & Ventilation in a Sealed Closet
Putting a hot, high-powered rig in a sealed closet traps heat, risking damage and noisy throttling. The fix? Use active ventilation—either a quiet exhaust fan or a small duct system. A vent with a fan pulls hot air out and cool air in, preventing temperature spikes.
For example, a 600W GPU can raise the closet temperature by 10-15°C within an hour if it’s sealed. Using a thermostat-controlled fan keeps the temperature steady, prolonging hardware life and avoiding those loud, throttling fans.
Proper ventilation not only prevents overheating but also affects your sound environment. Without adequate airflow, heat buildup can cause hardware to throttle, reducing performance and potentially damaging components. Additionally, stagnant air can lead to increased humidity, which may foster mold or corrosion. Implementing a well-designed ventilation system ensures your rig runs efficiently and quietly, maintaining both hardware longevity and acoustic integrity. For more details on cooling strategies, check out the [liquid vs. air cooling](https://thorstenmeyerai.com/liquid-vs-air-cooling-inference-rig/) guide.