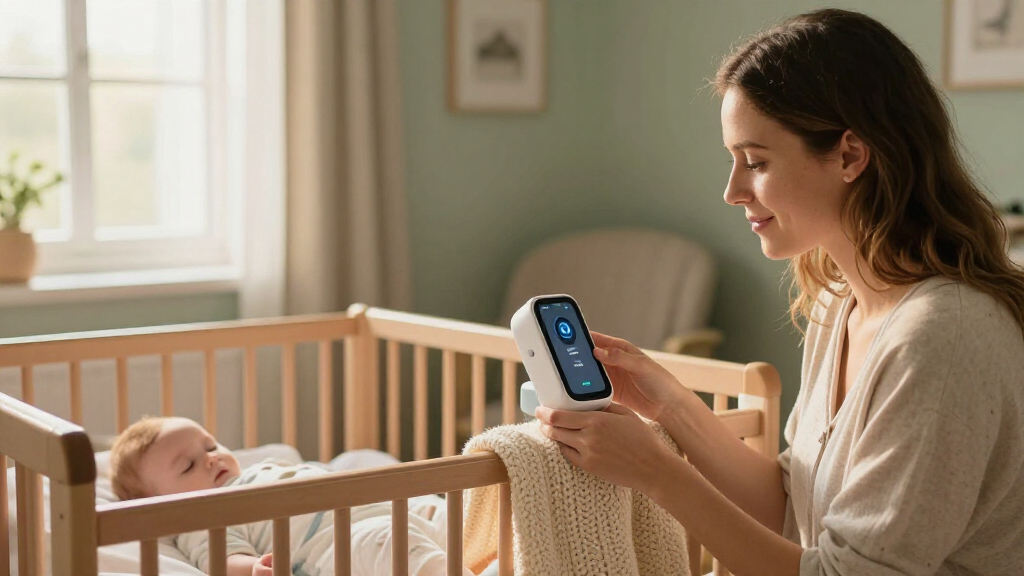

This guide helps parents and caregivers install a Wi-Fi baby monitor, connect it to a phone, and test video, audio, alerts, and remote access. It is written for beginners who can use a smartphone and follow an app setup process. Allow 30-60 minutes, including time for network checks and a full test. A connected monitor can help you observe and hear a child, but it is not a substitute for safe sleep practices or an adult checking on the child.

Get baby and family essentials delivered free — and shop member deals
- Fast, free delivery on millions of items
- Access to Prime Big Deal Days deals on October 6–7
- Prime Video, Amazon Music and more included

Owlet Dream Duo 3 Smart Baby Monitor System with Dream Sock and 2K HD Camera
- ✔ Included components: Dream Sock and Dream Sight camera
- ✔ Camera resolution: 2K HD
- ✔ Lens and zoom: 130-degree wide-angle lens; 4x zoom

VTech VM901 Smart Wi-Fi Baby Monitor with 1080p Camera and 5-Inch Screen
- ✔ Model: VM901
- ✔ Camera resolution: 1080p
- ✔ Parent unit: 5-inch HD screen

1080p Wi-Fi Baby Monitor with Camera, Audio, and 4-Inch Screen
- ✔ Video resolution: 720p video; display supports up to 1080p
- ✔ Screen: 4 inches; up to 14 hours of screen use
- ✔ Pan and tilt: 340 degrees
Difficulty: Beginner | Time: 30-60 minutes
What You’ll Need
Tools & Materials:
- Wi-Fi baby monitor camera and its power adapter
- Smartphone or tablet with the monitor manufacturer’s app
- Home Wi-Fi name and password
- A stable camera mounting surface or manufacturer-approved mount
- A second phone or another adult to help test remote alerts, if available
Knowledge:
- Basic ability to install an app and connect a phone to Wi-Fi
- Ability to identify the home Wi-Fi network and enter its password
Check the monitor’s setup guide for supported Wi-Fi bands, phone requirements, and any account rules before opening the app. Many monitors connect only to a 2.4 GHz network; some support 5 GHz or require a particular setup process. Keep the camera, cords, and mounts well away from the crib and out of a child’s reach. Follow the monitor maker’s mounting instructions and local safe-sleep guidance.
Owlet Dream Duo 3 Smart Baby Monitor System with Dream Sock and 2K HD Camera
The Owlet Dream Duo 3 earns our top spot because it is not just a Wi-Fi camera: it combines a Dream Sock that tracks pulse rate and oxygen levels with a 2K HD camera. For caregivers who want those readings and customizable alerts in the same system as video, that is a substantial difference from the VTech VM901 and the 4-inch dual-screen monitor, neither of which lists wearable health tracking.The camera’s 130-degree wide-angle lens can take in more of the nursery than the 4-inch model’s listed 68-degree field of view, while 4x zoom offers another way to check the image. Temperature and humidity readings also add useful room context. Security is another stated strength: the system uses 256-bit encryption. However, buyers should not mistake more data for a universal fit. The Dream Sock is intended for tracking up to 18 months, the system is compatible only in the United States, and the sock requires 2.4 GHz Wi-Fi to remain available. That network requirement deserves attention if your home setup relies on other bands or separates network devices.Compared with the VTech, Owlet prioritizes health tracking and wider camera coverage rather than a listed dedicated parent screen. Compared with the 4-inch model, it offers a higher-resolution camera and more specialized alerts, but also adds a wearable component and stricter compatibility conditions. We would choose it for families who specifically want the sock’s readings, not simply because it has the most features.
Pros:
- Dream Sock tracks pulse rate and oxygen levels with customizable alerts.
- 2K camera has a 130-degree lens and 4x zoom.
- Monitors room temperature and humidity.
- Uses 256-bit encryption.
Cons:
- System compatibility is limited to the United States.
- Dream Sock requires 2.4 GHz Wi-Fi to remain available.
- The wearable tracking may be unnecessary complexity for buyers seeking basic video monitoring.
Best for: Families in the United States who want a Wi-Fi camera combined with wearable pulse-rate and oxygen-level tracking.
Not ideal for: Households outside the United States, or buyers who want a straightforward camera-and-parent-screen system without a wearable or 2.4 GHz sock requirement.
Bottom line: Choose the Owlet Dream Duo 3 when its wearable health tracking is central to your decision, and look elsewhere if you mainly need a simple Wi-Fi camera and screen.
“Choose the Owlet Dream Duo 3 when its wearable health tracking is central to your decision, and look elsewhere if you mainly need a simple Wi-Fi camera and screen.”
VTech VM901 Smart Wi-Fi Baby Monitor with 1080p Camera and 5-Inch Screen
The VTech VM901 makes the most sense for families who want Wi-Fi access without having to rely on a phone for every check. Its 5-inch HD parent unit provides a dedicated way to view the nursery, while the free MyVTech Baby app adds remote access. That combination is more straightforward than the Owlet’s health-focused system if your priority is seeing and talking to your baby rather than collecting wearable readings.The camera records in 1080p and can pan, tilt, and zoom remotely, which helps when you need to adjust the view as your baby moves around the crib. Automatic night vision, motion and temperature alerts, and two-way talk cover the core monitoring jobs. Against the 4-inch dual-screen model, VTech offers a larger screen and a listed 1080p camera rather than 720p video with a display that supports up to 1080p. The tradeoff is that the 4-inch model specifies up to 14 hours of screen use, while no parent-unit battery life is provided for the VTech here, so buyers comparing portable viewing should verify that detail.App viewing depends on having a usable signal, so remote monitoring is not independent of connectivity. Temperature alerts are useful only if the readings prompt practical attention to nursery conditions; they are not a substitute for checking the room itself. Unlike the Owlet, the VM901 does not list health tracking, and unlike the 4-inch model, the available specifications do not state a battery-use figure for its screen. It is a strong middle ground for buyers who value a dedicated display and conventional camera controls over specialized monitoring.
Pros:
- Includes a 5-inch HD parent unit and free app-based remote viewing.
- 1080p camera offers pan, tilt, and zoom.
- Automatic night vision supports low-light viewing.
- Provides motion and temperature alerts plus two-way talk.
Cons:
- Remote app viewing depends on a usable signal.
- No parent-unit battery runtime is specified in the provided details.
- Temperature alerts still require caregivers to assess and respond to room conditions.
Best for: Caregivers who want both a larger dedicated parent screen at home and app access when away from the nursery.
Not ideal for: Buyers seeking wearable pulse and oxygen tracking, or shoppers who need a stated long screen-battery runtime before choosing.
Bottom line: The VTech VM901 is the balanced choice when a larger dedicated screen and 1080p camera matter more than wearable health tracking.
“The VTech VM901 is the balanced choice when a larger dedicated screen and 1080p camera matter more than wearable health tracking.”
1080p Wi-Fi Baby Monitor with Camera, Audio, and 4-Inch Screen
This 4-inch Wi-Fi monitor is a practical fit for households that want both an included parent display and phone-app access without stepping up to a health-tracking system. Its rechargeable screen is listed for up to 14 hours of screen use, which can suit caregivers who want to move around the home with a monitor in hand. Pan and tilt provide 340-degree movement, helping compensate for the relatively narrow 68-degree lens field by letting you redirect the camera.The main caveat is the gap between the product name and the detailed video specification: the camera is listed as 720p video, while the display supports up to 1080p. Buyers focused on camera image detail should favor the VTech VM901’s specified 1080p camera, or the Owlet’s 2K camera if they also want health tracking. This model still covers everyday basics with night vision, cry detection, temperature alerts, two-way audio, and lullabies. It also lists Wi-Fi and FHSS connectivity, though Wi-Fi is limited to 2.4 GHz.Against the VTech, this monitor’s clearest advantage is its stated screen runtime; the VTech instead gives you a larger 5-inch display and a 1080p camera. Compared with Owlet, it keeps the feature set simpler but lacks the sock’s health readings and wider camera lens. The stand is not included, so placement may take extra planning, and the camera base needs power even though the display is rechargeable. This is a reasonable pick when portable screen use matters more than resolution or specialized data.
Pros:
- Includes a parent display and smartphone-app monitoring.
- Rechargeable screen is rated for up to 14 hours of use.
- 340-degree pan and tilt support broad room coverage.
- Includes night vision, cry detection, temperature alerts, and two-way audio.
Cons:
- Camera video is listed as 720p, despite the display supporting up to 1080p.
- Wi-Fi supports only 2.4 GHz.
- Stand is not included, and the camera base requires power.
Best for: Families who want app access plus a rechargeable parent screen for moving around the home.
Not ideal for: Buyers prioritizing clearly specified 1080p camera video, a supplied stand, 5 GHz Wi-Fi, or wearable health tracking.
Bottom line: Choose this model for its rechargeable 4-inch screen and broad everyday features, but prefer VTech if 1080p camera video is a priority.
“Choose this model for its rechargeable 4-inch screen and broad everyday features, but prefer VTech if 1080p camera video is a priority.”
As an Amazon Associate we earn from qualifying purchases.
Before You Start
Choose a location with a clear view of the sleep area and a reliable Wi-Fi signal. Do not place the camera, cable, or power adapter inside or directly beside the crib where a child could reach them. If mounting above or near the sleep space, follow the manufacturer’s distance and fastening directions. Use a strong, unique password for the monitor account, and install app or camera updates only from the official app or manufacturer. A Wi-Fi monitor can lose connection or power; keep using your normal supervision and check-in routine.
Step-by-Step Instructions
Step 1: Check the monitor and network requirements
Read the quick-start guide and confirm that the camera, power adapter, and any mounting parts are present. Check which Wi-Fi band the model requires and whether the phone must be connected to the same network during setup. On your router or phone, identify the network name you plan to use. If your router combines 2.4 GHz and 5 GHz under one name and setup fails, consult the router or monitor instructions for a compatible setup option rather than guessing at settings.
Tip: Have the Wi-Fi password ready before beginning. Passwords are case-sensitive, and a copied extra space can prevent pairing.
Check: You know the monitor’s supported network requirements and have the correct Wi-Fi name and password available.
Step 2: Install the official app and secure your account
Download the monitor manufacturer’s official app from your phone’s app store. Check the publisher name against the product documentation before installing. Create an account with an email address you can access, then set a unique password that you do not use for other services. Turn on multifactor authentication if the app offers it. Grant only the phone permissions needed for features you intend to use; notifications and microphone access may be needed for alerts or two-way audio.
Tip: Do not share the account password. If another caregiver needs access, use the app’s invitation or family-sharing feature when available.
Check: The official app opens, your account is signed in, and any added security settings show as active.
Step 3: Power on the camera and add it in the app
Place the camera temporarily on a stable surface, connect its supplied adapter, and switch it on as directed. Wait for the indicator light or voice prompt that signals setup mode. In the app, choose the option to add a device and select the exact model. Follow the prompts to scan a QR code, enter a pairing code, or connect the phone to the camera’s temporary setup network. Keep the phone near the camera during pairing.
Tip: Do not use an unapproved power adapter; the wrong voltage or connector can damage the device or cause unreliable operation.
Check: The app recognizes the camera and advances to the Wi-Fi connection stage or displays a live setup preview.
Step 4: Connect the camera to Wi-Fi
Select the supported home network in the app and enter its password exactly. Wait for the camera to join the network; setup may take several minutes. Keep the phone and camera powered on and nearby while the app reports progress. If the app requests a QR scan, hold the phone at the distance and angle shown on screen, then wait for the camera’s confirmation tone or status light. Give the device a clear name, such as “Nursery,” without including private details.
Tip: Avoid guest networks or networks that require a browser sign-in unless the manufacturer says they work with the monitor. Do not reset the camera repeatedly while a connection attempt is still running.
Check: The app lists the camera as online and displays a live image or an online status without a setup error.
Step 5: Position and secure the camera
Move the camera to the planned location and use the supplied stand or approved mount. Aim it so the sleep area is visible without placing the device or any cord where the child can reach it. Secure the cable along a route outside the sleep space and away from places where it could be pulled, looped, or caught. Do not attach a mount to an unstable surface. Check the view from the app and adjust the angle while keeping all hardware firmly secured.
Tip: Recheck the mount after moving furniture, changing the crib setup, or adjusting the camera. Keep cords and accessories outside the crib and beyond the child’s reach.
Check: The app shows the intended area clearly, and the camera and cable are stable, secure, and inaccessible to the child.
Step 6: Set useful video, audio, and alert options
Open the device settings and review video quality, night vision, sound detection, motion detection, and notification options. Start with the features you need, then adjust sensitivity if routine room sounds trigger repeated alerts. Turn on phone notifications if you rely on them, and check that the app is allowed to send notifications in the phone’s system settings. Use two-way audio only as an optional communication feature, not as a replacement for going to the child when needed.
Tip: Alert names and controls vary by model. Read the app’s descriptions so you know whether a setting detects sound, movement, or both.
Check: Your chosen settings are saved, and the app indicates that notifications or detection features are enabled as intended.
Step 7: Update the device and review privacy controls
Check the app for camera firmware and app updates, and install available updates using the manufacturer’s process. Keep the camera powered and connected until an update finishes. Then review account access, shared users, recording options, and cloud storage settings. Remove access for people who no longer need it. If the app supports activity history or access logs, learn where to check them. Keep the router’s software current and use its security settings rather than leaving the network open.
Tip: Do not unplug the camera during a firmware update. If an update appears stuck, follow the maker’s recovery instructions instead of immediately resetting the device.
Check: The app shows no pending update, or confirms the update completed, and the listed users and privacy options match your choices.
Step 8: Test the monitor from the places you will use it
Watch the live view near the camera, then test it from another room and, if needed, from outside the home using the app’s supported remote connection. Have another adult make a normal sound or movement in the monitored area to check the selected alerts. Confirm that a notification reaches the phone, the live view loads, and audio works at a reasonable volume. Lock the phone and repeat the alert test. Test again after changing the camera location or Wi-Fi setup.
Tip: Do not create a false sense of security by relying on an alert alone. Phone settings, network outages, low battery, or app restrictions can delay notifications.
Check: The camera remains online, the view and audio are usable from intended locations, and selected alerts arrive in the test.
Common Mistakes to Avoid
- Choosing a Wi-Fi band the camera does not support. — Check the model’s network requirements first. Use a compatible network or the manufacturer’s recommended router setup if pairing fails.
- Entering the wrong Wi-Fi password or selecting a similarly named network. — Read the network name carefully, type the password exactly, and check for capitalization or accidental spaces before submitting.
- Placing the camera or cord within a child’s reach. — Use the approved mounting method and route every cable away from the crib and other accessible areas.
- Assuming alerts will work without testing phone settings. — Enable app notifications in both the monitor app and phone settings, then trigger a safe test alert and confirm it arrives.
Troubleshooting
Problem: The app cannot find or pair with the camera.
Solution:
Confirm the camera is powered and in setup mode, keep the phone nearby, and follow the app’s pairing method again. Check that the phone is on a supported Wi-Fi network and that the app has required permissions. Restart the camera and app if the maker recommends it; use a factory reset only as a last resort because it erases setup.
Problem: The camera connects but shows offline or buffers repeatedly.
Solution:
Check Wi-Fi signal strength at the camera location by temporarily moving it closer to the router. Restart the router and camera according to their instructions, then test again. If the signal is weak, reposition the router or use a compatible network extender. Confirm that the internet connection is working and that the router has not blocked the camera.
Problem: Video works but sound or notifications do not.
Solution:
Check the camera’s microphone and alert settings, the phone’s notification permissions, and any mute or quiet-hours controls. Raise the alert sensitivity slightly and run another test. Confirm that the app is not restricted from running in the background by the phone’s battery settings.
Problem: Remote viewing fails when away from home.
Solution:
Verify that remote access is supported and enabled in the app, then test while the phone uses cellular data rather than home Wi-Fi. Check for app updates and router restrictions. If access still fails, use the manufacturer’s support guidance and do not expose the camera by disabling router security features.
What Success Looks Like
The setup is complete when the camera stays online, gives a clear view of the intended area, and provides usable audio from the locations where you plan to check it. Any selected sound or motion alert reaches the phone during a test, and remote viewing works if the model supports it. The account has a unique password, access is limited to intended caregivers, updates are current, and the camera, mount, and cords remain secure and out of the child’s reach.
Next Steps
Check the live view and power connection before relying on the monitor each day, and review the app after phone, router, or camera updates. Repeat the alert test after changing settings or moving equipment. Remove shared users when they no longer need access, and replace weak or reused passwords. If the camera repeatedly loses power, overheats, or cannot stay mounted securely, stop using it and contact the manufacturer or replace it. Continue following safe-sleep guidance and check on the child directly when needed.
Frequently Asked Questions
Does a Wi-Fi baby monitor need internet access?
Many models use a local Wi-Fi connection for nearby viewing and an internet connection for remote access, notifications, or cloud features. The exact functions vary by model. Check the manufacturer’s instructions to learn what works during an internet outage.
Can I use a 5 GHz Wi-Fi network?
Only if the monitor supports 5 GHz. Some models require 2.4 GHz, while others support both bands. Check the product specifications and follow the maker’s pairing instructions; do not assume that every camera works with every router setting.
Can more than one caregiver use the monitor?
Often, yes. Use the app’s invitation or shared-user feature if available, and give each caregiver their own access. Avoid sharing the account password, and remove users when they no longer need access.
Will the monitor alert me if Wi-Fi or power fails?
Some apps report an offline camera, but alerts may not arrive if the phone, internet connection, or monitor loses power. Check whether your model offers an outage notification and do not depend on the monitor as your only supervision method.
Cold & flu season Picks
humidifiers
As an affiliate, we earn on qualifying purchases.