Recipes
Yogurt Covered Fruit: Healthy and Tasty Treats for Kids!
Indulge in a fun and nutritious twist on snacks with yogurt-covered fruit, perfect for impressing kids – stay tuned for mouthwatering ideas!
Ready to immerse yourself into the world of yogurt-covered fruit and impress your little ones with a delectable and nutritious snack? This delightful treat combines creamy Greek yogurt, vitamin-packed fresh fruits, and playful toppings like sprinkles for a fun and healthy twist. Simply indulge in piping yogurt blobs, adding your favorite fruits and toppings, freezing, and voila – a tasty treat awaits! Experiment with different toppings and involve your kids in the kitchen for a fun cooking experience. Stay tuned for more creative ideas to make snack time exciting and wholesome!
Key Takeaways
- Greek yogurt adds protein and creaminess to the treats.
- Fresh fruit provides essential vitamins and fiber.
- Toppings like sprinkles add fun and variety.
- Encourage kids to participate in making these healthy snacks.
- Store treats in the freezer for up to one month for convenience.
Ingredients & Supplies Needed
To make yogurt-covered fruit for kids, gather plain Greek yogurt, fresh fruit, and any desired toppings like sprinkles. This snack idea isn't only delicious but also a fun way to get kids excited about eating fruit.
Start by selecting a variety of fruits such as strawberries, bananas, or apples. Next, dip the fruit pieces into a bowl of Greek yogurt, ensuring they're fully coated. You can use toothpicks to make it easier for kids to handle the yogurt-covered fruit.
Plain Greek yogurt is a great choice for this snack as it's creamy, tangy, and packed with protein. It adds a nutritious element to the treat, making it a healthier alternative to sugary snacks. By incorporating fresh fruit, you provide essential vitamins and fiber that are beneficial for growing kids.
Feel free to get creative with toppings like colorful sprinkles to make the yogurt-covered fruit even more appealing to children. This simple snack is a sure way to make snack time both fun and nutritious for your little ones.
How To Make Frozen Yogurt Bites
To make frozen yogurt bites, start by lining a sheet pan with parchment paper and piping small yogurt blobs onto it.
Get creative by adding toppings like diced strawberries, blueberries, sprinkles, or mini chocolate chips for extra flavor and fun.
Once frozen for a few hours, enjoy these tasty treats by letting them sit at room temperature for a bit before digging in!
Freezing Yogurt for Bites
Pipe bite-size yogurt blobs onto a small sheet pan lined with parchment paper when preparing frozen yogurt bites. This step guarantees that your frozen yogurt bites are uniform in size and shape, making them perfect for snacking.
You can get creative and add diced strawberries, blueberries, or even chocolate chips on top of the yogurt blobs before freezing, adding a burst of flavor and texture to your healthy snack.
Once piped and topped, place the sheet pan in the freezer for 2-3 hours or leave them overnight until they're firm to the touch. For a quicker alternative, consider using Yoplait Go-Gurts, which can be frozen directly without the need for piping.
Before enjoying your frozen yogurt bites, allow them to sit at room temperature for a few minutes to slightly soften, enhancing the creamy texture. These frozen yogurt bites aren't only a delicious treat but also a convenient and nutritious snack option for kids and adults alike.
Topping Options for Variety
For added variety and flavor in your frozen yogurt bites, consider experimenting with different toppings like diced strawberries, blueberries, sprinkles, or mini chocolate chips. These toppings not only add a burst of color but also enhance the overall taste and texture of your snack.
Kids will love the combination of creamy frozen yogurt with the juicy freshness of fruits or the crunch of sprinkles and chocolate chips.
Mixing in pureed fruit or baby cereal with the yogurt can provide additional nutrition and a unique twist to your frozen yogurt bites.
If you're looking for convenience, Yoplait Go-Gurts can be a handy option to simplify the process, especially if you're making these treats with younger children.
Serving and Storage Tips
When storing your frozen yogurt bites, make sure they're placed in a freezer-safe bag or container once fully frozen. This helps maintain their freshness and prevents freezer burn.
To make it easier for kids to eat, allow the yogurt bites to sit at room temperature for about 2 minutes before enjoying. This slight thawing makes them softer and enhances their flavor.
For added nutrition and variety, consider mixing in pureed fruit or baby cereal into your yogurt bites. This not only boosts the nutritional value but also introduces new flavors that kids may love.
Yoplait Go-Gurts can be a handy option for making quick and easy frozen yogurt bites, perfect for snacking on the go.
To keep your yogurt bites fresh longer, store them in an airtight container. This prevents them from absorbing other odors in the freezer and maintains their delicious taste.
Adding toppings like diced strawberries, small blueberries, sprinkles, or mini chocolate chips can further customize your yogurt bites and make them even more irresistible for kids to enjoy.
Helpful Tips
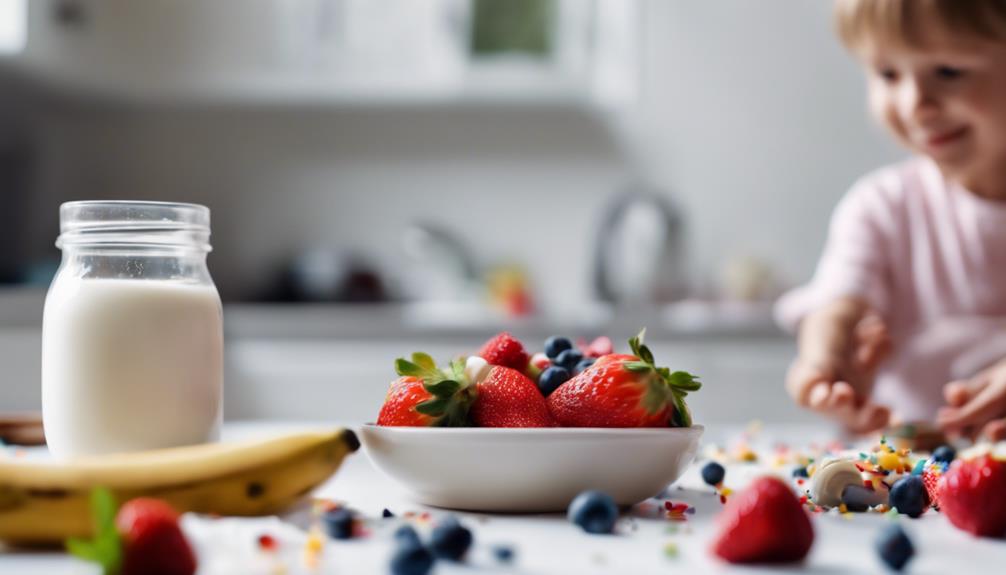
Here are some helpful tips for making yogurt covered fruit for kids.
When serving, consider adding fun toppings like sprinkles or mini chocolate chips to entice your little ones.
For storage, keep the frozen yogurt bites in an airtight container in the freezer for up to one month to enjoy whenever cravings strike.
Serving Suggestions
Consider enhancing the yogurt covered fruit experience by incorporating creative serving suggestions to delight your little ones.
When serving yogurt covered fruit as a school snack, remember that yogurt melts, so allow the bites to sit at room temperature for about 2 minutes before eating to soften slightly.
For an extra nutritious twist, mix in pureed fruit or baby cereal to amp up the flavor and health benefits.
If you're short on time, try using Yoplait Go-Gurts to simplify the process of making frozen yogurt bites.
Toppings are optional, especially for young children who may prefer plain yogurt bites. To keep things exciting, experiment with different flavors of yogurt to cater to various taste preferences.
Fresh fruit pairs wonderfully with yogurt, adding a burst of natural sweetness to each bite.
Get creative with your serving ideas to make snack time fun and enjoyable for your little ones!
Storage Recommendations
Storing frozen yogurt-covered fruit correctly is essential for maintaining its freshness and flavor. To keep your treats tasting their best, make sure to store them in an airtight container in the freezer. This helps preserve the yogurt coating and the fruit inside, ensuring a delicious snack every time you indulge.
For best taste and texture, it's recommended to consume your frozen yogurt-covered fruit within 2 weeks. Avoid the temptation to store them in the fridge for too long, as they might lose their delightful crunch and consistency.
When hunger strikes, grab a few from the freezer for a convenient and tasty school snack. Remember, it's best to serve them directly from the freezer to prevent any melting mishaps.
Variations & Fun Ideas
Get playful with your yogurt-covered fruit creations by mixing and matching different yogurt flavors and fruits for a delightful variety of snacks. For a fun twist, try using vanilla, strawberry, or blueberry yogurt to coat fruits like bananas, apples, or grapes.
The possibilities are endless when it comes to fruit variations! Add an extra layer of excitement by incorporating creative toppings such as a sprinkle of cinnamon, shredded coconut, or crushed nuts for that extra crunch and flavor.
To enhance the nutritional value of your treats, opt for Greek yogurt for a thicker and creamier coating. This not only adds a protein boost but also provides essential nutrients.
For a touch of indulgence, consider drizzling melted dark chocolate or honey over your yogurt-covered fruit. The contrasting flavors will create a decadent experience that both kids and adults will love.
Storage & Serving Suggestions
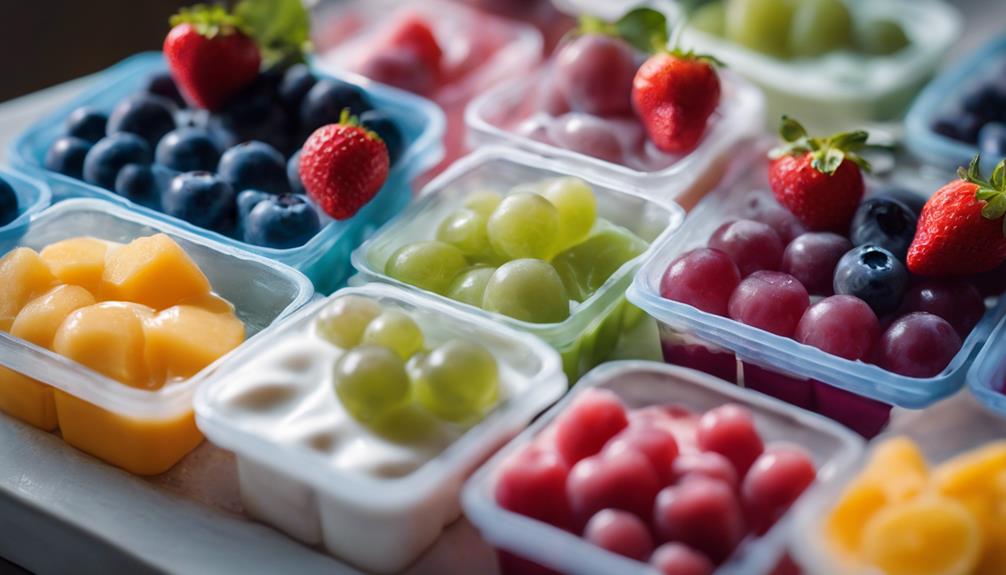
To guarantee the longevity and freshness of your frozen yogurt bites, proper storage is crucial in maintaining their quality. Store your yogurt bites in a freezer-safe bag or container to keep them tasting delicious.
When it's time to enjoy these tasty treats, let them sit at room temperature for about 2 minutes to reach the perfect consistency.
Keeping trays of yogurt bites in the freezer guarantees you always have a quick and easy healthy snack or dessert on hand. For the best flavor and texture, serve your frozen yogurt bites at room temperature.
If you're feeling adventurous, try making a batch of frozen applesauce bites for a fun twist on your snack options. Remember, a little creativity can go a long way in making healthy eating exciting for both you and your little ones.
Benefits of Yogurt-Dipped Strawberries
Indulge in the revitalizing and healthy benefits of yogurt-dipped strawberries as a delectable summer snack option. These delightful treats offer a perfect combination of sweetness from the strawberries and the tangy creaminess of yogurt. Not only are yogurt-dipped strawberries a delicious indulgence, but they also pack a nutritious punch. They're a fantastic way to get kids excited about eating fruit, making snack time both fun and healthy.
Making yogurt-dipped strawberries is a breeze, requiring just a few simple ingredients, including fresh strawberries and your favorite yogurt.
As May is National Strawberry Month, it's the ideal time to enjoy this invigorating snack.
Involving Children in the Kitchen
Encourage your children to actively participate in the kitchen by involving them in preparing yogurt-covered fruit, fostering a love for cooking and healthy eating from a young age.
It's a great idea to get kids of all ages involved in the kitchen, starting with simple tasks like washing strawberries – an essential skill.
Let them choose their favorite toppings for the yogurt-covered fruit, giving them a sense of ownership over the snack.
Engage them in the process of assembling the treats by helping them insert strawberries onto bamboo sticks, turning it into a fun and interactive experience.
As they sprinkle their selected toppings onto the yogurt-covered fruit, they'll add a personalized touch to their creations.
This hands-on approach not only teaches them valuable kitchen skills but also allows for creativity and experimentation.
By enjoying this activity together, you're not just making snacks; you're nurturing a positive attitude towards cooking and healthy eating in your children.
Recipe Details
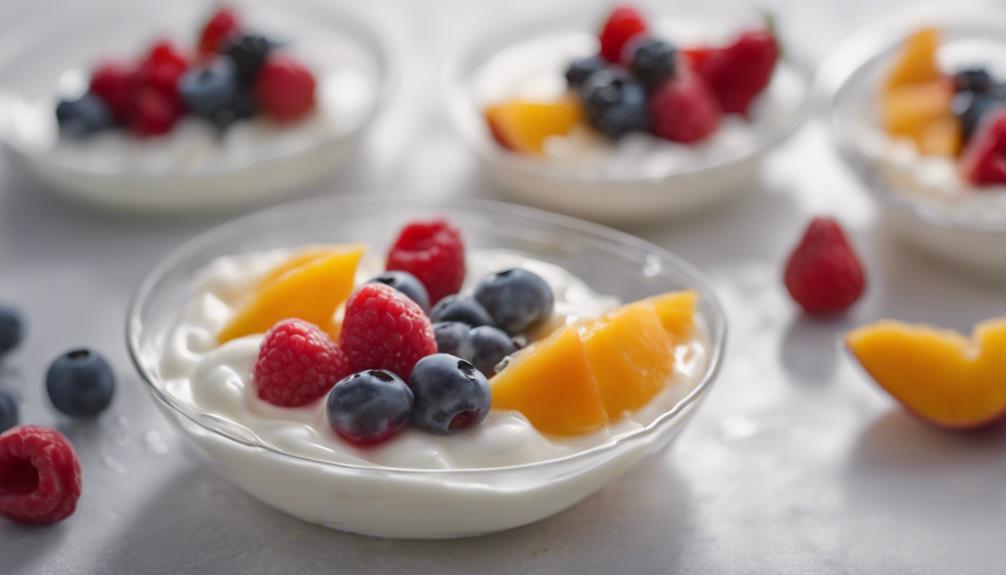
For the recipe details, start by gathering all the necessary ingredients and equipment before beginning the preparation. You'll need Greek yogurt, bananas or xanthan gum for thickness, sprinkles for decoration, peanut butter for added flavor, a baking sheet, and parchment paper to prevent sticking.
First, mix the yogurt and peanut butter until smooth. Slice your fruit of choice – strawberries, blueberries, or even apple slices work well. Dip each piece into the yogurt mixture, ensuring they're evenly coated. Place them on a baking sheet lined with parchment paper for easy cleanup.
If you want to add sprinkles, now's the time to do it! Once all the fruit is coated, pop the baking sheet into the freezer until the yogurt hardens. Once frozen, transfer the treats into an airtight container for storage.
These yogurt-covered fruit delights will stay fresh in the freezer for up to two weeks, ready to enjoy whenever the kids need a healthy and tasty snack.
Frequently Asked Questions
Is Yogurt-Covered Fruit Healthy?
Yes, yogurt-covered fruit is healthy when made with plain or Greek yogurt. It provides essential nutrients like protein, calcium, and vitamins. Opt for fresh fruits like strawberries and blueberries for added fiber and antioxidants. Enjoy this nutritious treat!
Is Yogurt a Good Snack for Kids?
You know yogurt's a excellent snack for kids! Packed with calcium, protein, and probiotics, it's a filling treat that supports growth. Customize it with fruit or nuts for added nutrients and flavors.
What Are Healthy Snacks for Kids School?
When thinking about healthy snacks for school, you want options that keep kids energized. Consider protein-packed treats with essential nutrients. Don't forget to adhere to school guidelines for allergies. Portable choices like yogurt-covered fruit make snack time a breeze!
What Is a Healthy Alternative to Chips for Kids?
Looking for a healthy alternative to chips for kids? Try yogurt-covered fruit! It's a tasty and nutritious option that provides essential vitamins, minerals, and fiber while satisfying those snack cravings. Give it a try!
Conclusion
To sum up, yogurt-covered fruit is a delightful and nourishing snack that will be enjoyed by both children and adults.
By using a handful of basic ingredients and a touch of imagination, you can make a playful and wholesome treat that will please your craving for something sweet.
So don't hesitate, be inventive in the kitchen, engage the little ones, and savor these delicious frozen yogurt bites that are bound to become a household favorite!
Recipes
Dream of Eating Groundnut? What It Means for You!
Open the door to unlocking hidden meanings behind your dreams of eating groundnuts and discover how they can shape your well-being and growth!
Dreaming of eating groundnuts? Your subconscious might be nudging you towards prioritizing health, growth, and well-being in your life. These dream symbols could symbolize vitality and inner abundance. Positive aspects include joy and upcoming victories, while encountering rotten peanuts indicates potential dissatisfaction. Dream analysis offers valuable insights into desires and promotes personal growth. By understanding these messages, you can reveal hidden truths and empower personal development. So, next time you dream of munching on groundnuts, pay attention—your dreams may hold the keys to a healthier, fulfilling life!
Key Takeaways
- Symbolizes desire for health, growth, and wellness.
- Indicates need for balanced and healthy lifestyle.
- May hint at potential decline in health luck.
- Prepares for potential relationship challenges.
- Offers insights into personal growth and well-being.
Symbolism of Eating Ground Nuts
When dreaming of eating ground nuts, the symbolism often signifies a deep-rooted desire for health, growth, and overall wellness in your life. Your subconscious is highlighting the importance of prioritizing your well-being and nurturing your physical and mental health. It serves as a gentle nudge to pay attention to your body's needs and aim for a balanced and healthy lifestyle. So, next time you dream of indulging in these crunchy treats, consider how you can incorporate more nutritious foods and self-care practices into your daily routine.
Furthermore, the act of consuming roasted peanuts slowly in your dreams may hint at a potential decline in your health luck, reminding you to take proactive steps to safeguard your well-being.
Dreaming of eating dry peanuts could be your mind's way of preparing you for upcoming relationship challenges or obstacles on the horizon. Remember, dreams about collecting scattered ground nuts suggest a promising outlook for your health and overall abundance. Embrace the symbolism, and let it guide you towards a path of vitality and wellness.
Psychological Analysis of Dream Symbols
In delving into the psychological analysis of dream symbols, one can uncover profound insights into the subconscious mind's workings and the hidden meanings behind various dream elements.
Dreams of eating groundnuts, according to Compensation Theory, might indicate a deep-seated longing for recovery and revitalization. Teleology suggests that such dreams could be sending you messages about taking proactive steps towards your future. Archetypes reveal that groundnuts symbolize vitality, health, and growth in the dream domain.
If you find yourself collecting groundnuts in a dream, it may signify a subconscious desire for inner abundance and well-being. These unconscious messages involving groundnuts could be nudging you towards actions that lead to a healthier and more fulfilling life.
Positive and Negative Aspects
In conclusion, the dream of eating groundnuts reveals both positive and negative aspects that can offer valuable insights into your subconscious mind's messages. Dreaming of munching on groundnuts signifies joy, pleasure, and upcoming victories in your life. It's like a sneak peek into the happiness and success waiting for you around the corner.
On the flip side, encountering rotten peanuts in your dreams might indicate looming dissatisfaction or potential disappointment on the horizon. It's like a gentle reminder to stay vigilant and address any areas of concern before they escalate.
If you find yourself shelling groundnuts while dreaming, it could be your subconscious nudging you towards becoming more open and transparent in your relationships. However, spotting rotten peanuts in your dream serves as a cautionary sign of decay or negative changes heading your way.
Additionally, the act of buying peanuts in a dream often symbolizes the fulfillment of your needs and desires. So, pay attention to these dream details; they might hold the key to understanding your inner thoughts and emotions.
Importance of Dream Analysis
Understanding the importance of dream analysis can provide valuable insights into your subconscious mind's messages. Dream symbols, like eating groundnuts, hold significance that can unlock hidden meanings within your psyche. By paying attention to your dreams and delving into their analysis, you can unravel the mysteries of your innermost desires and needs. This self-reflection not only aids in personal growth but also promotes overall well-being. Through dream analysis, you can start recognizing patterns in your thoughts and emotions, gaining a deeper understanding of yourself.
Importance of Dream Analysis | |
---|---|
Insights into Subconscious | Recognition of Patterns |
Symbolic Meanings | Personal Growth |
Self-Reflection | Well-being |
Understanding Desires | Emotional Awareness |
Promoting Self-awareness | Psychological Development |
Self-Understanding Through Dream Interpretation
Beginning the exploration of self-understanding through dream interpretation enables you to delve into the depths of your subconscious mind and uncover hidden truths about yourself.
Dreams of eating groundnuts hold symbolic meanings that can reveal your desires for health, growth, and wellness in various aspects of your life. By analyzing these dreams, you gain valuable insights into your mental, emotional, and physical needs, fostering a deeper understanding of yourself.
Paying attention to dream symbols, such as groundnuts, allows you to recognize your innermost desires and aspirations that mightn't be consciously acknowledged.
Dream interpretation serves as a powerful tool for personal growth, as it reveals hidden messages and provides guidance towards overall well-being. Understanding the significance of eating groundnuts in your dreams empowers you to navigate through your subconscious thoughts and emotions with clarity.
Embrace this journey of self-discovery through dream analysis, and discover the potential for profound self-understanding and growth.
Frequently Asked Questions
What Is the Meaning of Eating Groundnuts in Dreams?
When you dream of eating groundnuts, it symbolizes a subconscious desire for health and well-being. Tasting roasted peanuts slowly may indicate a potential decline in health luck, while collecting scattered groundnuts signifies improving health and abundance.
What Is the Spiritual Power of Groundnut?
Groundnut's spiritual power lies in grounding energy, nurturing the soul, and symbolizing abundance. It offers stability and nourishment, reminding you to seek spiritual growth, inner strength, and balance in life to embrace the universe's abundance.
What Does It Mean When You Dream About Eating Nuts?
When you dream about eating nuts, it signifies desires for health, growth, or satisfaction. The act symbolizes pleasure, anticipation, or intimacy. Different forms may represent aspects of health or relationships. Details reveal insights into well-being and desires.
What Do Peanuts Represent in Dreams?
Peanuts in dreams symbolize desires for health, growth, and wellness. Eating groundnuts may represent anticipation of relationship issues or sexual desires. They reflect feelings about physical health, nutritional status, and well-being, signifying improving health and abundance.
Conclusion
So, next time you dream of munching on groundnuts, remember that it might symbolize your desire for nourishment and security. Dive deeper into the meaning behind this dream to uncover hidden emotions and thoughts that could be guiding you in your waking life.
Dream analysis may seem like a quirky hobby, but it can offer valuable insights into your subconscious mind. Who knew a simple snack could reveal so much about your inner world?
Keep dreaming, keep exploring, and keep snacking!
Recipes
Date Paste Recipe: Natural Sweetener for Baby Foods!
Find out how to make a natural sweetener for baby foods with this easy date paste recipe – a healthy and delicious alternative to refined sugar!
Looking to sweeten your baby's food naturally? Whip up some date paste for a healthy and delicious touch! Soak soft dates in hot water, blend with water for a smooth paste, and store in the fridge. Start with 1-2 teaspoons for babies, adjusting gradually. Beyond baby food, use date paste in baking, as a glaze, or in dressings. Blend pitted dates with hot water, adjusting for consistency. Engage with the community for tips and flavor enhancements. For a versatile and refined-sugar-free option, try date paste over syrup. Sweeten up your baby's meals with this tasty alternative!
Key Takeaways
- Soak Medjool dates in hot water for rich sweetness.
- Blend soaked dates with water for smooth paste texture.
- Start babies with 1-2 teaspoons, gradually increasing.
- Use date paste as natural sweetener in baby foods.
- Label and store date paste in airtight container in fridge.
Preparation Tips for Date Paste
Soaking your soft dates in hot water is an essential step in preparing Date Paste. Opt for Medjool dates for a rich, caramel-like sweetness. The soaking time can vary based on the type of dates you have. Whether it's an overnight soak or just 10 minutes in warm water, the goal is to soften the dates for blending.
Once soaked, toss them into a blender with water to create a smooth Date Paste. For larger batches, start with 1 cup of dates, adjusting the water to achieve your desired consistency. This natural sweetener not only adds a lovely flavor to your baby foods but also provides essential nutrients.
When it comes to storage, keep your Date Paste fresh by refrigerating it for a couple of weeks. If you've made a big batch, Date Paste freezes beautifully for up to 6 months. Get ready to sweeten those baby foods with this delicious and nutritious paste!
Storage Guidelines for Date Paste
Consider storing your date paste in the refrigerator for several weeks in an airtight container to maintain its freshness and quality. For longer-term storage, freezing date paste for up to 6 months is also an option.
Here are some guidelines to guarantee your date paste stays fresh and safe for consumption:
- Use an airtight container: Seal your date paste in a container to prevent air exposure, which can lead to spoilage.
- Label with preparation date: Keeping track of when you made the date paste helps you know its freshness and usage timeline.
- Check for spoilage: Before using stored date paste, inspect for any signs of spoilage such as mold, off-smell, or unusual texture to ensure safety.
Date Paste Quantity for Babies
When feeding your little one date paste, remember to start small with just 1-2 teaspoons to gauge their reaction.
Slowly increase the quantity as they grow and develop a taste for it.
It's all about age-appropriate portion control to make sure they enjoy the benefits without overdoing it!
Serving Size for Babies
For babies, determining the appropriate serving size of date paste starts with introducing 1-2 teaspoons initially. Date paste can be a delightful natural sweetener to enhance the flavor and nutritional value of baby foods.
Here are some tips to help you navigate serving sizes for your little one:
- Start small: Begin with a conservative amount of 1-2 teaspoons to gauge your baby's tolerance and enjoyment of date paste.
- Gradual increase: As your baby grows and becomes accustomed to the taste and texture, you can gradually increase the quantity in their meals.
- Three-day rule: Remember to follow the three-day guideline when introducing date paste or any new food to make sure your baby doesn't have any allergic reactions.
Age-Appropriate Portion Control
Guarantee your baby's portion sizes of date paste align with their age and dietary needs by starting with 1-2 teaspoons as a guideline. When introducing date paste into your baby's diet, it's important to begin with a small amount to assess their tolerance and avoid any potential digestive issues.
Gradually increasing the quantity as your baby grows and shows no signs of intolerance is the best approach. Remember to follow the three-day rule when introducing new foods to watch out for any allergic reactions.
Date paste not only serves as a natural sweetener for baby foods but also enhances their flavor profile and boosts the nutritional value of the meals. While date paste is safe for babies when consumed in moderation, it's crucial to maintain portion control to ensure your little one receives a balanced diet.
Keep an eye on how your baby responds to date paste and adjust the portion sizes accordingly to support their healthy growth and development.
Alternate Uses of Date Paste
Looking to jazz up your recipes with a natural twist?
Date paste is your go-to ingredient!
From sweetening your morning pancakes to enhancing the flavor of your favorite desserts, date paste offers a versatile and healthy alternative to traditional sweeteners.
Get ready to elevate your cooking game with this simple yet impactful ingredient!
Recipe Versatility
Explore the various ways date paste can be creatively incorporated into different recipes to introduce natural sweetness and essential nutrients to your baby's diet.
Date paste isn't only a great sweetener for baby foods, but it can also be used in various other recipes to enhance flavors and provide healthy alternatives. Here are some exciting ways to utilize date paste:
- Spread it on dosas, pancakes, Chapati/roti, or bread for a natural sweet touch that toddlers and babies will love.
- Replace sugar in baking cakes, muffins, and cookies with date paste to create healthier snacks for your little ones.
- Elevate desserts like puddings, custards, and fruit salads by adding date paste for a mild, caramel-like sweetness while boosting the nutritional value of the treats.
Incorporating date paste into your recipes not only adds sweetness but also introduces fiber and essential nutrients to your baby's diet in a delicious way.
Sweetening Options
To diversify your baby's diet, consider incorporating date paste as a versatile sweetening option in various recipes beyond traditional baby foods. Date paste serves as a natural sweetener, offering a healthier choice compared to refined sugars. This versatile ingredient can enhance the flavor of purees, porridges, and other baby food recipes while ensuring optimal nutrition for your little one. Not only can date paste be used in baby foods, but it also makes a delicious spread for dosas, pancakes, Chapati/roti, or bread, adding a touch of sweetness to meals for both babies and toddlers. Additionally, you can substitute date paste for sugar in baking cakes and desserts for babies, introducing a natural and nutritious sweetness. By incorporating date paste into your baby's meals, you're not only providing a sweet flavor but also essential nutrients like fiber, iron, calcium, and potassium, promoting your child's overall health and well-being.
Sweetening Option | Description | Usage |
---|---|---|
Date Paste Spread | A natural sweetener rich in essential nutrients | Spread on dosas, pancakes, Chapati/roti, or bread |
Baking Substitute | Healthy alternative to refined sugars | Use in baking cakes and desserts for babies |
Flavor Enhancer | Enhances taste without compromising on nutrition | Mix into purees and porridges for added sweetness |
Nutrient Booster | Adds fiber, iron, calcium, and potassium | Incorporate into various baby food recipes |
Cooking Enhancements
Consider incorporating date paste into your cooking repertoire to elevate the flavors and nutritional value of your dishes. This versatile ingredient can be used beyond sweetening baby foods.
Here are some cooking enhancements you can explore with date paste:
- Use date paste to glaze roasted vegetables for a caramelized sweetness.
- Mix date paste into marinades for meats to add depth of flavor.
- Stir date paste into salad dressings for a hint of natural sweetness and richness.
Date Paste Recipe Details
To guarantee the quality of your date paste, start by soaking whole or pitted dates in hot water to soften them before blending into a smooth puree. Make sure that your dates are free of pits to avoid damaging your blender. Use a powerful blender to achieve a silky texture that works well in various recipes.
Once blended, transfer the date paste into an airtight container for storage. When storing, refrigerate the paste for up to three months. If you want to keep it longer, consider freezing it for extended use.
Remember to check the consistency of your date paste before storing it. If it's too thick, you can add a bit of water and blend again until you reach the desired texture. Date paste is a versatile sweetener that can be used in a wide range of dishes, making it a handy ingredient to have on hand.
Now that you know the details of creating and storing date paste, you're ready to add this natural sweetener to your baby food recipes!
Feedback and Adjustments for Recipe
You may want to adjust the amount of hot water used in the recipe based on user feedback for best results.
Incorporating user feedback is crucial to enhancing the recipe for date paste. Here are some adjustments to contemplate based on user feedback:
- Opt for a gradual approach: Try adding the hot water gradually while blending the dates to achieve the desired consistency.
- Experiment with different ratios: Test varying amounts of hot water to find the perfect balance that suits your preference.
- Seek input from the community: Engage with other users to gather additional insights and tips for improving the recipe.
Date Paste Query: Paste Vs. Syrup
When deciding between date paste and syrup for baby foods, consider the different textures and applications each offers. Date paste serves as a natural sweetener, providing a healthy alternative to refined sugars. It boasts a thick, spreadable consistency, ideal for incorporating into various baby food recipes.
On the other hand, date syrup presents itself as a liquid sweetener, offering versatility in different culinary creations. If you prefer a pourable texture, you can easily convert date paste into a syrup by simmering it with water.
Both date paste and syrup can enhance the flavor of dishes without the need for refined sugars, making them excellent options for baby foods and beyond. Understanding the distinctions between the two allows you to experiment and find the perfect fit for your recipes.
Frequently Asked Questions
Can You Use Dates to Sweeten Baby Food?
You can use dates to sweeten baby food. Start with small amounts and increase gradually based on your baby's taste. Date paste is a healthy alternative to refined sugars, enhancing flavor and nutrition in baby purees, porridges, and snacks.
How Do You Use Dates as a Natural Sweetener?
To use dates as a natural sweetener, blend pitted dates with water to make date paste. Add this paste to baby porridges or purees for a sweet, nutrient-rich boost. Dates offer a healthy alternative to refined sugars in baby foods.
Can Babies Eat Date Paste?
Yes, babies can eat date paste. Start with small amounts, gradually increasing as they grow. Follow the three-day rule when introducing new foods like date paste to watch for allergies. It's a natural sweetener for baby foods!
How to Use Date Paste Instead of Sugar?
To use date paste instead of sugar, simply swap it in a 1:1 ratio in your baby food recipes. Enhance nutrition and sweetness effortlessly. Incorporate date paste into purees and porridges for a healthier alternative that provides essential nutrients.
Conclusion
So, there you have it – date paste isn't only a natural sweetener for baby foods, but it's also versatile and easy to make at home.
With the right preparation tips, storage guidelines, and quantity adjustments for babies, you can enjoy the benefits of this healthy alternative to refined sugars.
So go ahead, get creative in the kitchen and whip up a batch of date paste to sweeten up your little one's meals!
Recipes
Beet Puree for Baby: Nutritious and Vibrant First Food!
Boldly introduce your baby to the vibrant world of homemade beet puree, a nutritious and colorful first food that will nourish their taste buds and health!
Ready to explore the world of homemade baby food with beet puree? It's a vibrant and nutritious first food choice that will jazz up your baby's meals! Packed with essential vitamins and fiber for digestion, it's a colorful addition to your little one's diet. Simply roast, peel, and blend beets with fruits or veggies for extra flavor. Store in the fridge for a week or freeze in ice cube trays. Spice it up with cinnamon or ginger for added zest! Immerse yourself in the realm of homemade baby food with beet puree—it's a tasty, healthy treat that your little munchkin will love! Discover more beet-licious tips and tricks for your baby's meals.
Key Takeaways
- Nutrient-rich puree supports growth and immunity.
- Mix with fruits and veggies for variety.
- Provides essential fiber for digestion.
- Vibrant color adds mealtime excitement.
- Easy storage in fridge or freezer for convenience.
Why Choose Beet Puree for Babies
When introducing solid foods to your baby, opting for beet puree can be a nutritious and flavorful choice. Beets are nutrient-rich, packed with essential vitamins and minerals like calcium, folate, and Vitamin C, providing a wholesome start to your little one's culinary journey.
The versatility of beets allows you to mix them with other purees, introducing diverse flavors to your baby's palate early on.
Not only are beets delicious, but they also offer a healthy dose of fiber, which is important for aiding digestion and preventing constipation in infants. This makes beet puree a wise choice for supporting your baby's tummy health as they start solid foods.
Additionally, the immune-boosting properties of beets contribute to your baby's overall well-being, while the nutrients in beet puree support their growth and development.
In essence, beet puree isn't just a first food; it's a powerhouse of nutrition that can benefit your baby's health in multiple ways.
The Ingredients and Preparation
To create beet puree for your baby, start by roasting the beets until tender, then peel and puree them in a food processor. Beets are packed with essential nutrients like calcium, folate, and Vitamin C, making them an excellent choice for your little one's diet. Mixing beet puree with fruits such as applesauce or vegetables like butternut squash can introduce exciting flavors and variety to your baby's meals. When preparing beet puree, consider storing it in the fridge for up to 5 days for convenience or freeze it in ice cube trays for longer preservation.
Ingredients | Preparation | Benefits |
---|---|---|
Beets | Roast until tender | Rich in nutrients |
Food Processor | Peel and puree | High in Vitamin C |
Ice Cube Trays | Store or freeze | Adds flavor variety |
Including beets in your baby's diet not only adds vibrant color but also contributes to their growth and immune support. Experiment with different combinations to find the perfect mix that your baby will love.
Making Beet Puree at Home
For a nutrient-rich and colorful addition to your baby's diet, consider making beet puree at home. Beets are packed with essential vitamins and minerals, making them an excellent choice for your little one's first food.
To make beet puree, start by roasting the beets in the oven until they're tender. Once cooked, peel the beets and blend them into a smooth puree using a food processor. You can get creative by mixing beet puree with other fruits and vegetables like applesauce, butternut squash, or broccoli to introduce different flavors and provide variety in your baby's meals.
When it comes to storage, store the beet puree in airtight containers in the fridge for up to 5 days. If you want to keep it longer, freeze the puree in ice cube trays for convenient portioning.
This homemade beet puree not only offers a burst of color and flavor but also delivers essential nutrients vital for your baby's growth, digestion, and immune system support. Get ready to introduce your little one to a vibrant world of nutritious goodness!
Tips and Serving Suggestions
Consider enhancing your baby's beet puree by incorporating a variety of fruits and vegetables to introduce diverse flavors and textures. Mixing in ingredients like applesauce or butternut squash can not only add a twist to the taste but also provide additional nutrients for your little one's growth and development. Below are some creative serving suggestions to make mealtime enjoyable for your baby:
Fruit Combos | Vegetable Additions | Spices |
---|---|---|
Pear | Sweet Potato | Cinnamon |
Blueberries | Carrots | Ginger |
Banana | Spinach | Nutmeg |
Avocado | Zucchini | Cardamom |
Storage and Freezing Instructions
For best freshness, store beet puree in airtight containers in the fridge for up to 5 days.
When it comes to freezing, consider using ice cube trays for convenient portioning and storage lasting up to 3 months.
Thaw your frozen beet puree in the refrigerator or at room temperature before serving it to your little one.
To keep things organized, opt for labeled freezer bags to easily track when the puree was made.
Remember to cut your beets into similar-sized pieces before cooking and blending for a smoother puree texture.
- Airtight containers in the fridge help maintain the vibrant color and nutrients.
- Ice cube trays make it simple to grab just the right amount when needed.
- Thawing in the refrigerator preserves the puree's texture and flavor.
- Labeled freezer bags prevent confusion and help you stay organized.
- Cutting beets into similar-sized pieces ensures even cooking and blending for a perfect consistency.
Frequently Asked Questions
Are Beets a Good First Baby Food?
Yes, beets are a fantastic first baby food choice! They offer a range of essential nutrients, support healthy digestion, and have a naturally sweet taste that babies love. You can easily mix beets with other purees for added nutrition.
How to Puree Beets for Babies?
To puree beets for babies, roast, peel, and blend them until smooth. Make sure they're cooked soft to avoid choking hazards. Mix with other fruits/veggies for tasty combos. Store and freeze for easy meals.
What Are the Benefits of Beetroot Puree?
Beetroot puree offers a wealth of benefits for your little one. Packed with essential nutrients, this vibrant puree aids digestion, supports immune health, and introduces delicious flavors. Easily made at home, it's a convenient choice for busy parents.
Is Raw Beetroot Safe for Babies?
You might wonder, is raw beetroot safe for babies? Yes, it is when prepared correctly. Grate or cook it until soft to avoid choking hazards. Introduce this vibrant veggie in ways that suit your little one's needs.
Conclusion
To sum up, beet puree is a nutritious and vibrant first food option for your little one. Packed with essential nutrients and easy to prepare, this colorful puree is sure to be a hit at mealtime.
So go ahead, whip up a batch of beet puree at home and watch as your baby enjoys every spoonful of this delicious and healthy treat!
Happy feeding!
-
Vetted4 months ago
9 Best Personalized Father's Day Gifts for Your Husband – Thoughtful and Unique Ideas
-
Activities and Learning3 months ago
Engage Quiet Students With Interactive Quiz Apps
-
Activities and Learning3 months ago
Robaxin: CVS Orders, Renal Health Caution
-
Activities and Learning3 months ago
Avelox: A Prescription-Free Risk
-
Activities and Learning3 months ago
Cabaser: Risks, Alternatives, and Gambling Concerns
-
Activities and Learning3 months ago
Active Forum Requires User Interaction for Access
-
General Tips3 months ago
Struggling Mom Quotes: Words of Hope and Encouragement!
-
Activities and Learning3 months ago
Get Levaquin: Treat Infections & Stay Safe